
Penligent Logo
  • Pricing
  • Docs
  • AI Pentest
  • Pentest Report
service@penligent.ai

Product

  • Pricing
  • FAQ

Resources

  • Docs
  • Hacking Labs
  • Tech Support

Company

  • About

Legal

  • Terms
  • Security
  • Privacy
Language
English
English中文日本語한국어EspañolFrançaisPortuguês (Brasil)DeutschРусскийالعربية
© 2026 Future Share LLC.
Disclaimer: Penligent is for authorized security testing only. You must have explicit permission from the target owner. Unauthorized use is prohibited and solely your responsibility.

Penligent User Guide · Docs Overview

Quick Links
Quick Start
InstallConfigure the Python EnvironmentCreate a Penetration Testing ProjectInteract with a Task Using the Agent Console
Feature Guide

Penligent User Guide

Quick Start

Create a Penetration Testing Project

Create a project and specify an authorized target before starting a test.
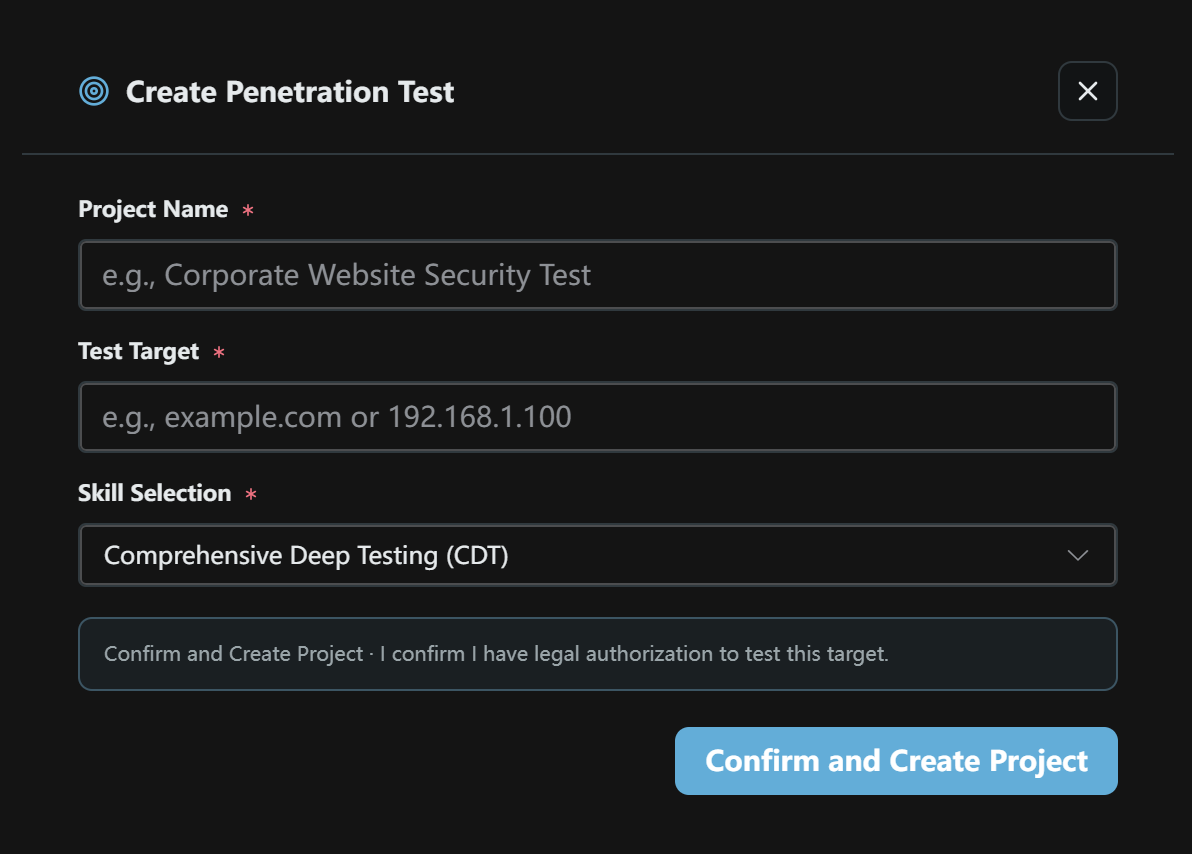
Create a penetration testing project
  1. Click New Project in the top bar or project sidebar.
  2. Enter a project name in Project Name.
  3. Enter an authorized domain, hostname, or IP address in Test Target.
  4. Choose a testing plan from the Skill Selection menu. The screenshot shows Comprehensive Deep Testing (CDT) as the default.
  5. Confirm that you have legal authorization to test the target.
  6. Click Confirm and Create Project. The project will appear in the project list.

Project Creation Fields

Field / ControlRequiredDescriptionExample / Notes
Project NameYesThe project name used to identify and manage the penetration testing project.Corporate Website Security Test
Test TargetYesThe target for this test. Enter a domain name, hostname, or IP address.example.com or 192.168.1.100
Skill SelectionYesSelect the skill or testing plan to use for this test.Defaults to Comprehensive Deep Testing (CDT); use the drop-down menu to change it.
Confirm and Create ProjectConfirmation and buttonConfirm that you are authorized to test the target, then click the button to create the project.Do not test targets without authorization.